Topmenü - Englisch

Archive | Blog @en

DramaQueen 4.0.0 BETA – UPDATE REPORT


Check out DramaQueen 4.0 BETA and discover the new extension for radio plays and stag plays and the new dark mode in advance!

We have also activated 30 test days for all BETA testers! The test period applies to EVERYONE, regardless of whether you already have a license or not (yet)!

Click here to download the BETA version.


Important information about 4.0.0 BETA

  • DramaQueen now also supports a dark design (dark mode).
  • This BETA opens directly in dark mode for demo purposes.
  • In the program settings or in the main menu ‘View’ (last option at the bottom) the appearance (light or dark) can be changed so that it can also differ from the system settings. (For an optimal appearance, however, system settings and software settings should match, as certain colors are controlled by the system.)
  • A few partial functions and optimizations are currently missing. For example, radio plays and stage plays cannot yet be imported and converted in the first step. In dark mode, individual colors still need to be adjusted. When revising with AI, the formatting of the text elements is not yet retained when the revised text is inserted into the Text panel. And of course, there may still be a few small bugs hidden in the BETA.
  • If you want to go back to the current version 3.7.3, you can find the installer here on the regular download page. You can go back to version 3 at any time without any problems.


Update notes for BETA version 4.0:


NEW EXTENSION: STAGE PLAYS – FOR DRAMAQUEEN PRO3


  • DramaQueen now supports the creation and formatting of stage plays.
  • The new media option ‘Stage play’ is offered on the start panel. The following text elements are available in the ‘Script’ text level:
    • General
    • Stage instructions
    • Character + text
    • Narrator
    • Sound
    • Music
    • Light
  • Formatting can be done using TAB cycling, formatting pop-up (opens with the ENTER key), the text element drop-down in the toolbar or shortcuts.
  • Stage plays can be divided into scenes or performances.
  • Characters that have already been created no longer need to be typed, but can simply be selected in the Smart Type pop-up.
  • Script formatting ensures that all text sections comply with the standard formatting conventions for stage plays. This means:
    • The numbering of the scenes can be placed after (e.g. ‘Scene 1’) or before (‘1st Scene’). The desired position of the number can be set in the layout settings, tab ‘Numbering’, section ‘Placement’.
    • Stage instructions are automatically placed in parentheses by default. (The brackets can be removed in the layout settings of the text element ‘Stage directions’ in the ‘Text additions’ section.)
    • Speaking characters are automatically terminated with a colon.
    • The character text begins on the same line, indented to the right. (In the ‘Basic Layout’ section of the ‘Script’ Layout menu you can define how far to the right the second tab position for the dialog text should be indented.)
    • In addition, stage directions that concern (technical) effects, i.e. the use of sound, music, light or a narrator’s voice, can be formatted separately: These elements begin left-aligned with the label ‘SOUND:’, ‘MUSIC:’, ‘LIGHT:’ or ‘NARRATOR:’. (The labels can be changed in the layout settings in the ‘Text additions’ section.) The sound, music or light effect is described in more detail on the same line, indented to the right. These elements are written in brackets by default (like the stage directions). (The brackets can be removed in the layout settings.) Since these extra text elements are not part of the classic, traditional layout of stage scripts, they are not embedded in the TAB cycling. However, they are available via ENTER, shortcuts and in the toolbar.


NEW EXTENSION: RADIO PLAYS – FOR DRAMAQUEEN PRO3


  • DramaQueen now also supports the creation and formatting of radio plays (and scripted podcasts).
  • The new media option ‘Audio drama / radio play’ is offered on the start panel. The following text elements are available in the ‘Script’ text level:
    • General
    • Character + text
    • Narrator
    • Sound
    • Music
    • ABM
    • SFX
    • Mix
  • Formatting can be done via TAB cycling, formatting popup (opens with the ENTER key) or shortcuts.

  • Locations and characters that have already been created don’t need to be typed, but can simply be selected in the Smart Type popup.
  • Layout settings:
    • In the ‘Basic layout’ section you can define how far to the right the second tab position for the dialog text, the narrator text and the descriptions of the sound and music effects should be indented.
    • Under ‘More options’ you can layout each text element individually.
  • The script formatting ensures that all text sections comply with the standard formatting conventions for radio plays. This means:
    • Speaking characters are automatically terminated with a colon.
    • The character text begins on the same line, indented to the right.
    • The narrator text begins left-aligned with the name ‘NARRATOR:’. (In the layout settings of the text element ‘Narrator’, the name can be changed in the section ‘Text additions’ -> ‘Preceding text’ (in the case of a podcast, for example, to ‘HOST:’).
    • The sound elements begin left-aligned with the name of the type of sound: ‘SOUND:’, ‘MUSIC:’, ‘AMB:’, ‘SFX:’ or ‘MIX:’. (These labels can be changed in the layout settings in the ‘Text additions’ section.) On the same line, indented to the right, the sound or music is described in more detail. By default, the sound elements are underlined. (The underline can be removed in the layout settings.)
    • Instead of typing the names of the individual text elements, a simple TAB or ENTER is enough and the labels NARRATOR, SOUND, MUSIC, ATMO, SFX or MIX are set – including a colon after them.


NEW FEATURE ‘DARKMODE’ – FOR DRAMAQUEEN FREE, PLUS & PRO


  • DramaQueen now also supports a dark design (dark mode).
  • This BETA opens directly in dark mode for demo purposes.
  • The appearance (light or dark) can be changed in the program settings or in the main menu ‘View’ (last option at the bottom).
  • Export/Print: Dark mode only affects the screen display. When printing, exporting to another text format, or creating a PDF, the text remains in the classic layout – dark text on a white background.
  • When creating dark mode in the current basic functionality, the basis was also created for offering customizable designs or other themes in the future.


IMPROVEMENTS

  • More colors have been added to the color selection for coloring the text background.
  • Individual AI prompt suggestions have been improved.


Continue Reading - 0

Your FAQ on AI integration


It is clear that the new option to integrate AI into DramaQueen raises some questions and we addressed them in our last Post also couldn’t accommodate every detailed information. That’s why here – for everyone to read – your FAQ…


…about the legal situation:

You can find information and information about this in our Data protection additional agreement.

…to activate the AI integration:


Is the AI integration now part of the regular DramaQueen software?
The AI integration in DramaQueen is and remains optional – that means you can ignore it completely so that the AI features are not activated at all. Only if you actively activate the AI integration with an extra code (the API key) will the connection to the AI be established. This means you can switch the AI in DramaQueen on and off very flexibly and selectively, for example only use it for certain work steps or dq documents.


I already use ChatGPT and have a corresponding subscription. Then why isn’t the AI integration working for me?
The ChatGPT Plus subscription and the Open AI API account are two different services for which OpenAI does not allow a combination.
If you just want to afford a service, you can either use the AI chat in DramaQueen to ask the AI any other things you would like to know – or the Playground of your API account. With this trick you can save yourself the ChatGPT Plus subscription and only pay for your AI usage based on usage. Especially if you don’t need the AI’s services permanently, using DramaQueen will most likely cost you much cheaper than the €267 that the ChatGPT-Plus subscription currently costs annually.


What are the advantages of AI integration in DramaQueen compared to ChatGPT?
The direct integration and connection of AI in DramaQueen offers decisive advantages:

  • An AI trained for fictional writing, combined with tailored prompts, ensures the best results. You benefit from the high level of expertise of the DramaQueen team, consisting of trained authors, dramatic advisors and award-winning filmmakers.
  • The AI tools in DramaQueen are linked to DramaQueen’s functionalities and metadata. This provides the AI with structured data that it can use efficiently as context or knowledge base. These tools are also precisely tailored to the specific needs of writers.
  • Text excerpts that have been revised with the help of AI are automatically and seamlessly integrated back into the overall text – including their formatting.

In addition, the use of AI in DramaQueen – compared to using the ChatGPT Plus subscription – has three major advantages:

  • With ChatGPT, input is used to train or improve the AI model according to OpenAI’s data protection regulations – not when used in DramaQueen. So your content will not be used for any other purposes.
  • ChatGPT refuses to answer if swear words, sex scenes or crime are involved, which makes editing crime or love stories a little more difficult. When used in DramaQueen, however, the AI is much less strict and even answers sensitive questions. ;)
  • When using DramaQueen, you only pay for your specific consumption and do not have to take out a subscription.


What are the advantages of incorporating AI into DramaQueen compared to Sudowrite, Neuroflash, Plotdot or Fictionary?

  • no (high-priced) subscriptions
  • no token limits
  • focus on elaborated revision options
  • extremely helpful, editable prompt templates


I am only offered GPT-3.5 as an AI model.
In order for all AI models to be offered, OpenAI’s API account must have a successful payment or be loaded with money. You can top up your account or initiate a payment at ‘Billing’ .

…on the costs of using AI:


How much do I have to pay for using AI in DramaQueen?
The costs depend on the chosen AI model, the number of tokens used, i.e. the amount of text in the input (source text + instructions) and the output. Therefore, unfortunately we cannot give a specific number.
You can find an overview of the current token prices here: https://openai.com/pricing

We would advise you to set a low cost limit in your account, e.g. $5 (the option is in the menu item ‘Settings/Limits’), and then you can see for yourself how long you can work with the AI for this $5. You can see the current status of your consumption at ‘Usage’.
As far as DramaQueen is concerned, the provision of AI integration and the implementation of the AI connection via the corresponding features in DramaQueen are free for PRO and PLUS users of version 3.
One more tip:
Because you can combine several instructions or prompts when revising with AI, you can be particularly economical in token consumption. So instead of doing a separate pass each time, for example for spelling, style and narrative tone, you only use a fraction of the usage if you give several instructions at once. :)

…on how the new ‘Revise with AI’ option works:


For example, with the prompt suggestion ‘narrative tone/genre’, how can I tell the AI which of the many offered narrative tones I would like to have, for example ‘ironic’, ‘poetic’ or ‘factual’?
You can edit the text in the prompt field. So you can simply delete all the adjectives that you don’t want. Or, of course, you can delete all the suggested adjectives and insert the appropriate adjectives yourself.
This way you can customize any prompt suggestions to suit your specific needs. For example, if you write your story in Swiss German or would like to follow the instructions of the Austrian Dictionary instead of Duden, you can use the prompt template For ‘Orthography’just adjust accordingly:
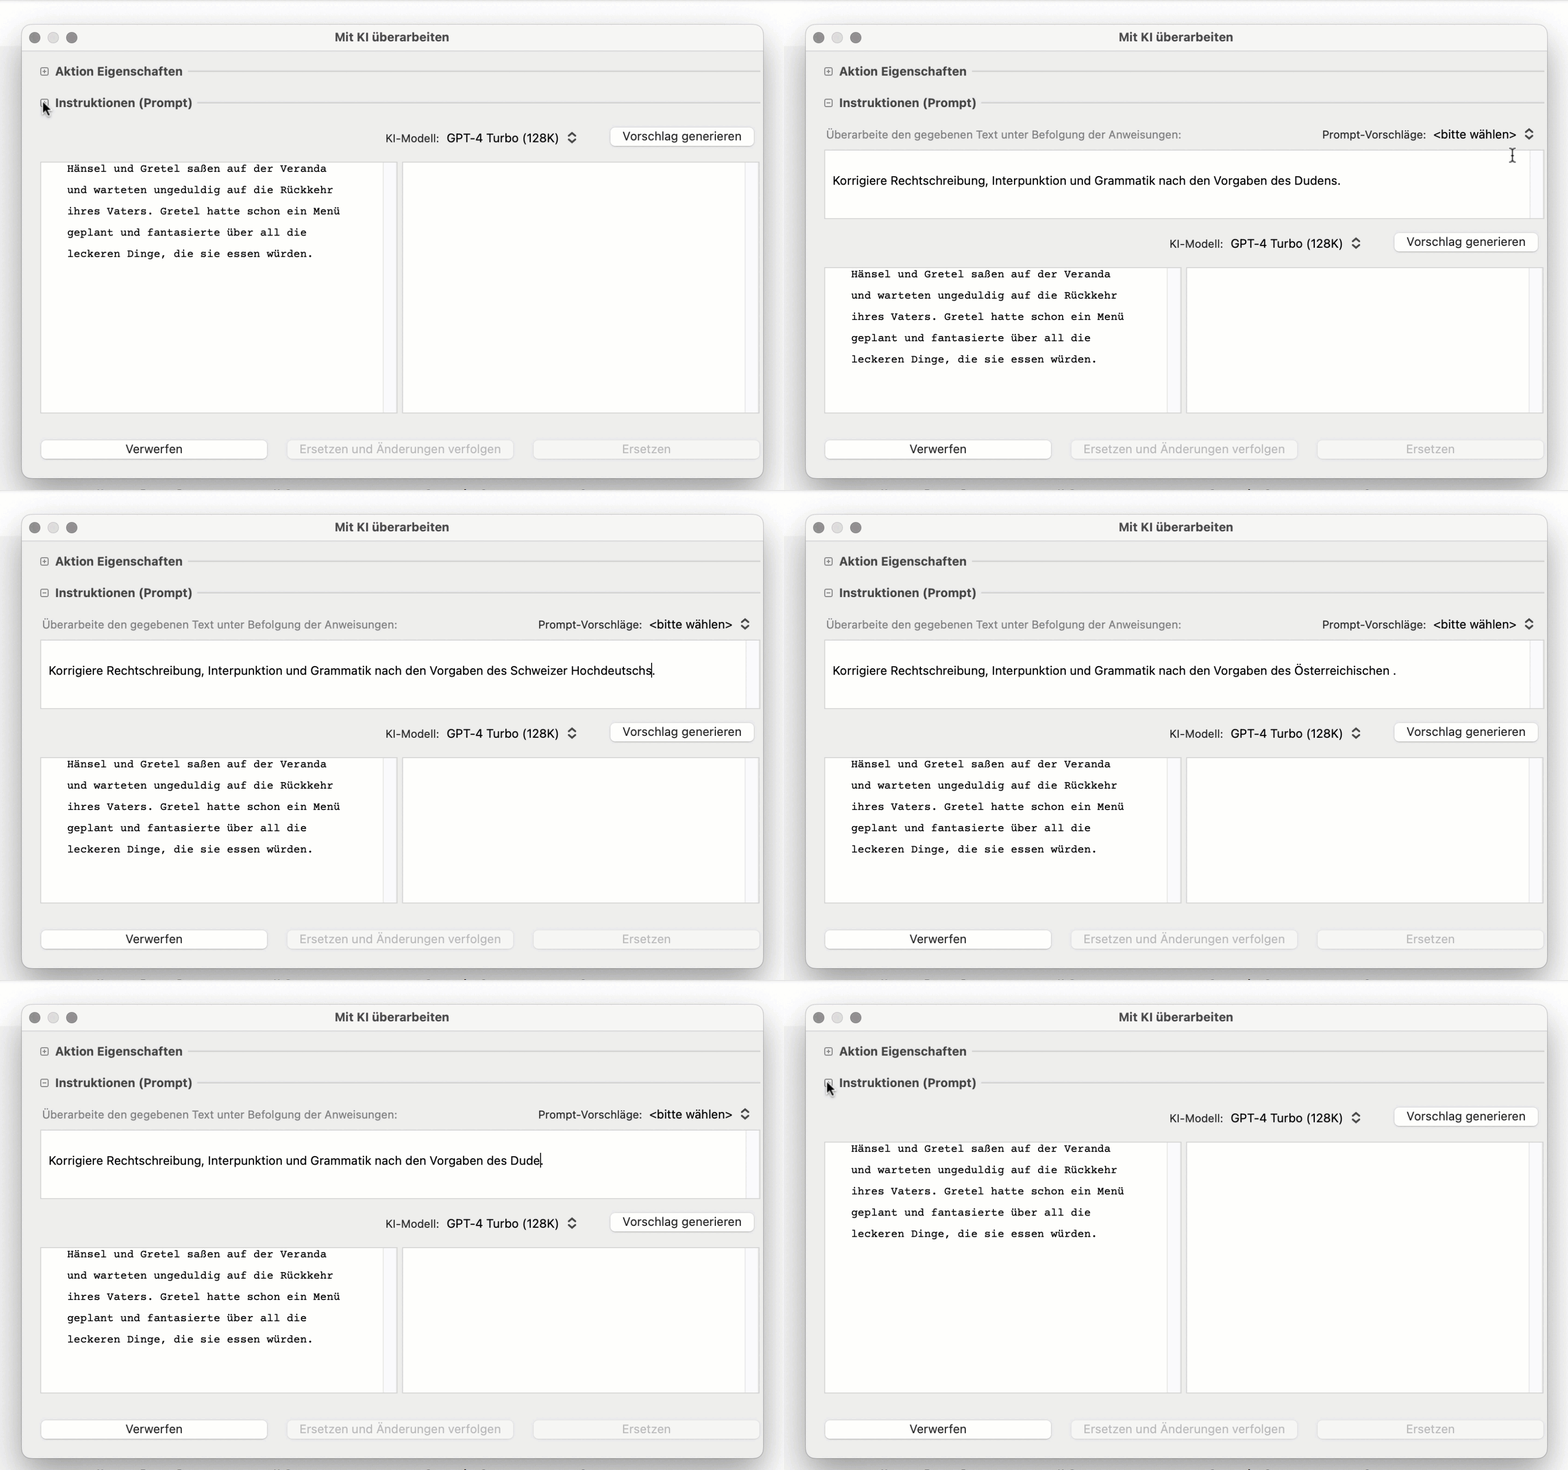


I would like to have more space for the individual fields when revising with AI:
To create more space, you can collapse the instruction field when your prompt is ready – see above.
On the other hand, you have the option to make the dialog window larger, or even to completely fill the screen. DramaQueen remembers the set size so that the next time the window opens in the desired size.


I cannot enter any instructions or prompts and the selection menu for the prompt suggestions is not displayed to me either.
This is either because the instructions field is collapsed – then it can be expanded by clicking on the section.
Or the dialog window is too small so that the prompt field cannot be displayed even when expanded. In this case it helps to make the dialog window larger.


Why is the ‘Revise with AI’ option sometimes not offered in the context menu?
First of all, the option is only offered in the context menu of the Text panel when text is selected. There is also currently the restriction that the option is only available if the marked text is within an element, i.e. within a scene or a step.

…on how the new ‘AI chat’ panel works’:


I can’t copy anything from the AI chat.
Copying is currently not possible via the edit menu (we have to provide that later). But you can simply copy the texts from the AI chat using the shortcut C or the context menu.


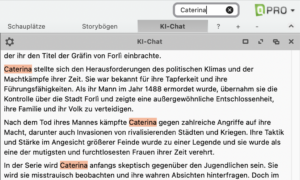
It would be very helpful to be able to jump to keywords in the chat history using a search function.
The search field in the toolbar at the top right also works for chat: Simply activate the AI chat panel and enter one or more search terms – and the terms will be highlighted:

Continue Reading - 0

DramaQueen 3.4: Flexible Levels & Fresh-up

In the new version 3.4 we have made the handling even simpler – especially for new users and novelists – and the user interface even more flexible and reduced, so that you can focus even better when writing your story.


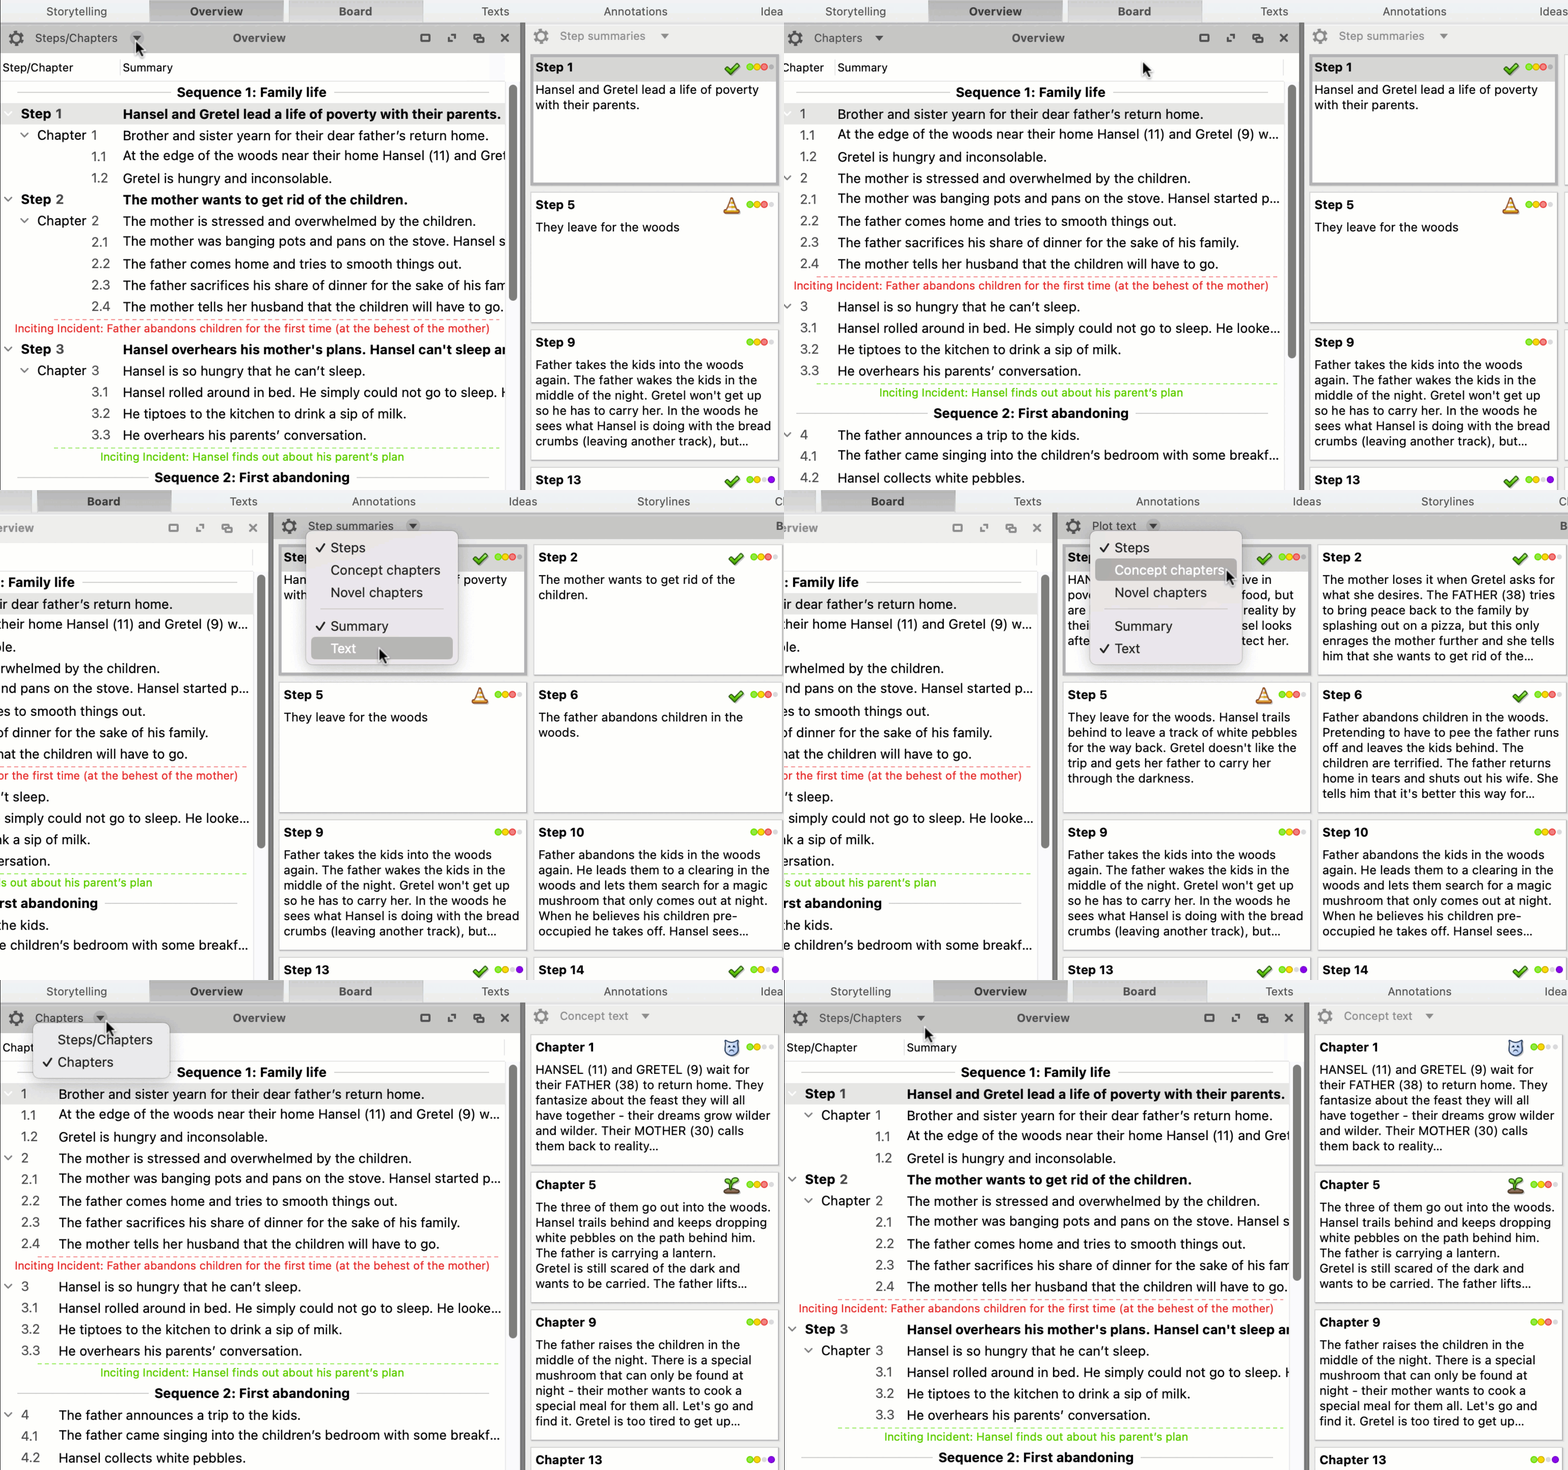
In DramaQueen PRO you can now switch your text and outline levels on or off separately and thus reduce or increase the complexity of your story with one click – depending on how much context you need at the moment.

In the Overview and in the Board you can use the speed dial to set the level you want – and also whether you want to see the summaries or if you want to see the entire text of each scene:


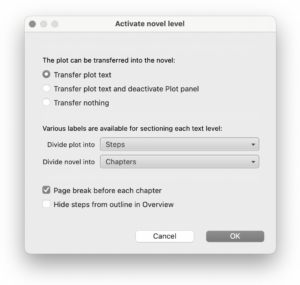
When moving to the next text level you can configure it in advance according to your requirements and decide, among other things, whether you want to keep the higher outline level or not.

This makes it possible, for example, to keep your plot as reference text but hide the plot structure.


We have also visually reduced the table bars and buttons on the DramaQueen user interface in all versions, the categories ‘Origin’ and ‘Humor ‘ added in the Characters panel and a new paragraph style added:

With the text element ‘First Paragraph’ the first line of a paragraph is not indented in novel narratives. For the ‘Normal’ text element, the first line is then indented by default.


All improvements can be found as always in our update report.

Continue Reading - 0

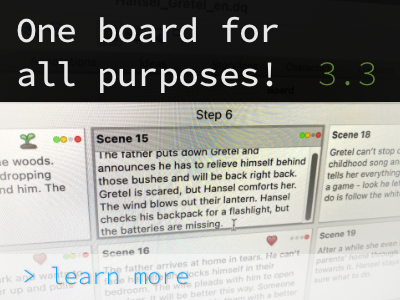
DramaQueen 3.3: One board for all purposes

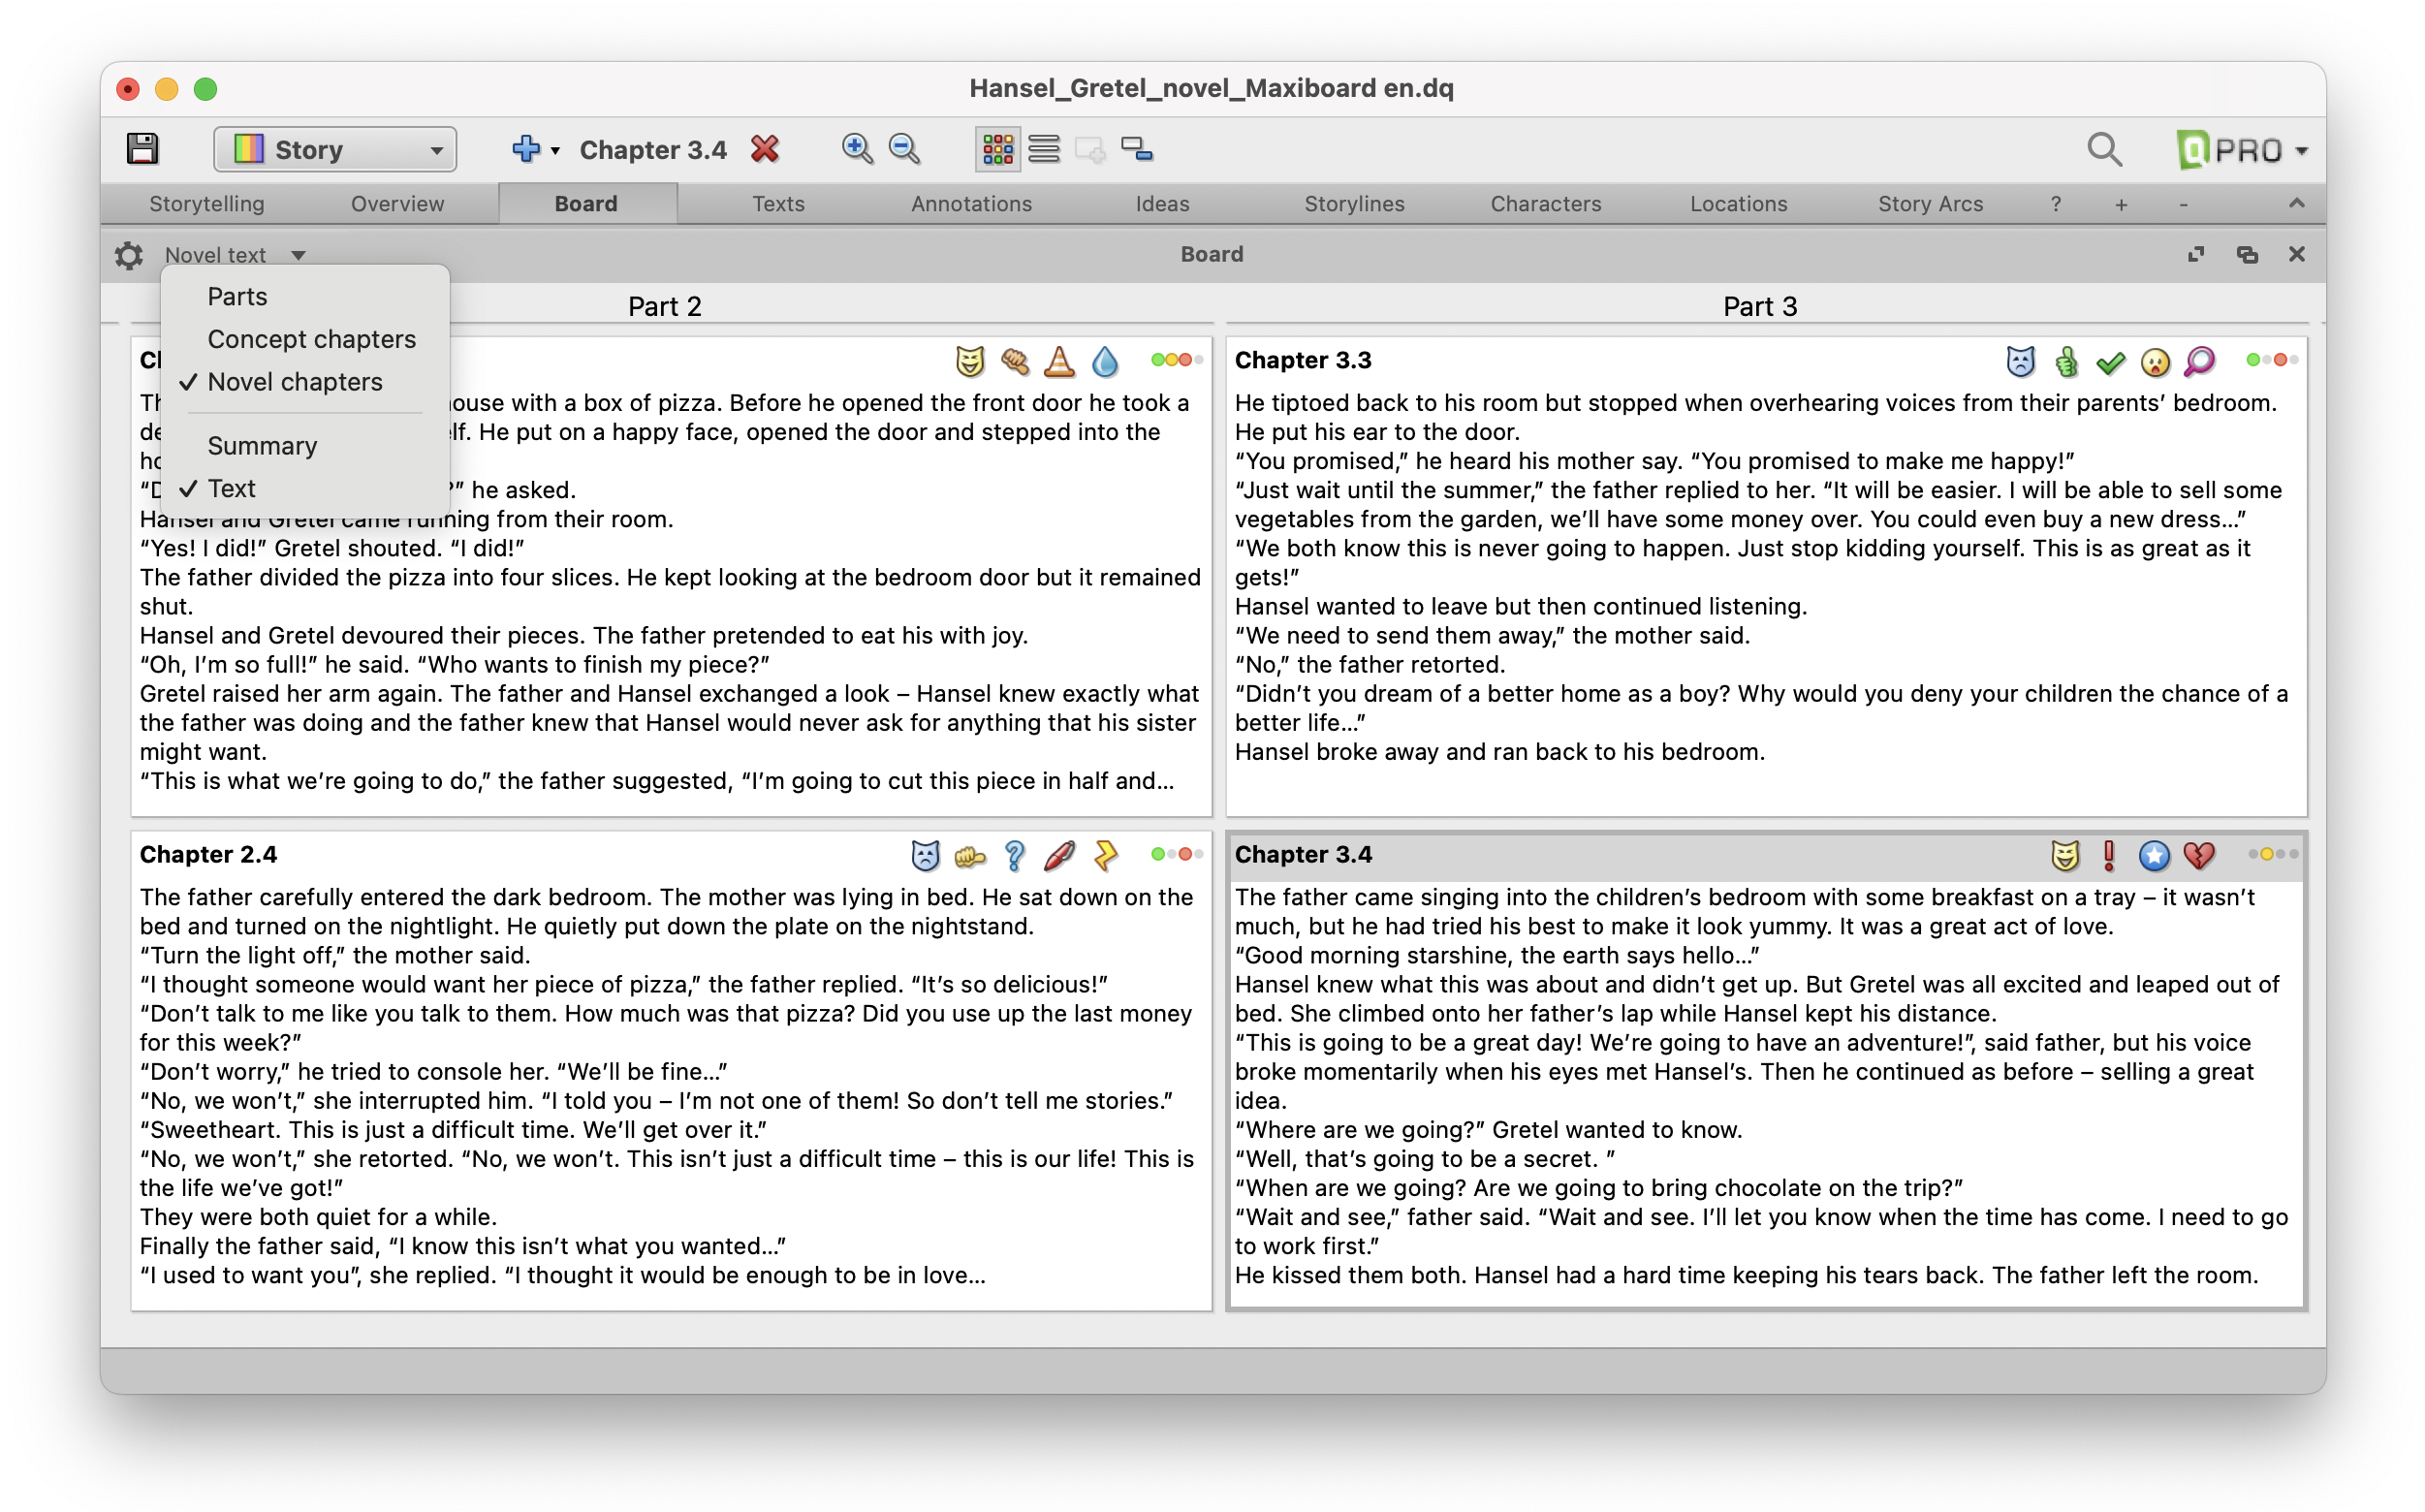
The new Board panel presents itself as a bridge between plotting and writing: We have turned the Board into a Swiss army knife from which you can pull out a wide variety of functions: an all-purpose weapon in the story development process with cards that can be short & catchy just as well as long & detailed, that can display icons, storylines, summaries or the entire texts, and that can arrange themselves in a flexible grid or line display.


In the Board, the possibilities and advantages of the Overview and Text panel are now combined, which allows a seamless transition between the individual development stages of the story.

This way, the Board can “grow” bit by bit, also in the size of the cards: In the beginning, you might only write one-line keywords, and the further you develop the individual scenes, the more extensive and detailed the content and information on the cards will become.

Here’s a tip: If you set the Board to ‘Text’, the texts you enter in the Board cards will be transferred directly into the plot or treatment text. :) This means that if the option ‘Card contents: Text’ is selected, the contents of the Board and the Text panel are mirrored, and if you edit the texts, the changes are applied to the other panel in each case.
If, on the other hand, you set ‘Summary’, the contents of the Board and the Overview panel are mirrored, or all changes are applied reciprocally.

The new features and improvements in detail:

  • In addition to the grid arrangement, the cards in the Board can now also be displayed in line mode. The number of lines per card is freely selectable (gear menu option ‘Lines of text per card’).
  • Also new is the possibility to display and edit the actual text (and not only the summaries) in the cards (gear menu option ‘Card contents’ -> ‘Text’). Accordingly, more card sizes are now offered with a larger maximum size.
  • The Board panel has a new context menu with comprehensive options (right mouse button click on card). Some options also allow multiple selection, so you can delete, move into archive, cut, copy and paste all selected elements at once.
  • The cards can now also show the tags as well as the assignment of the steps or scenes to several storylines. (Previously, only the complete coloring of the cards in the color of one storyline was possible.) The storylines are displayed as color circles at the top right of each card, the tags to the left.
  • The Board can now be configured separately from the Overview panel (via its own gear menu). This affects the options ‘Numbering’, ‘Card contents’, ‘Summaries’ and ‘Tags’ (including submenus).
  • It is now possible to work with multiple Board panels that are configured differently. For example, two boards can be set up side by side, displaying different levels and/or card contents.
  • In the Texts panel, the keyboard shortcuts Alt+↑ and Alt+↓ can be used to jump to the previous or next elements.
  • If one customizes the structure, now also the colorings are also taken over.
  • In the ‘Story Arc’ section of the Storylines panel, the drop-down options of the turning-points are now more clearly named: ‘Turn to the positive / negative’ (instead of just ‘Positive’ or ‘Negative’). In addition, the description fields now visually subordinate themselves better to the turning-points to which they refer.


IMPORTANT INFORMATION FOR ALL WINDOWS-USERS: DELETE OLD DRAMAQUEEN INSTALLATION

DramaQueen is now a 64-bit program. The previous version is therefore not getting automatically overwritten (like in all earlier updates). To prevent the old version from opening, please proceed as follows:
– In Windows Explorer, click on the “C:” drive, look in “Programs (x86)” and find the “DramaQueen” folder. (Check for safety that there are no project files (filename.dq) of yours in there).
– Now delete the whole “DramaQueen” folder. Done :)
(In case you had a link to DramaQueen (e.g. on the desktop or the taskbar), you have to re-create it. You can start DramaQueen from the “Program Files” folder and chose the “Pin to taskbar” option from the right-click menu.)


Continue Reading - 0

DramaQueen 3.2: Smart PDF export


DramaQueen 3.2 comes up with small but very smart new options around PDF export and new fields in the Character and Locations panels.


Smart PDF-Export

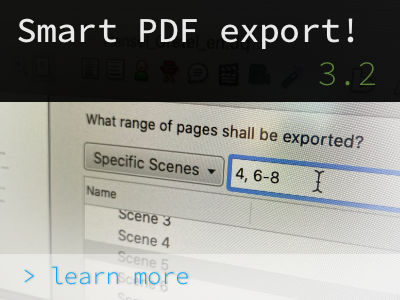
The new dialog appears after selecting the text level and PDF file name:

With the ‘Page selection’ option you can enter the desired pages – separated by commas, spaces or hyphen. It is also possible to combine the specification of individual pages and a specific page range (e.g. “2, 4, 6-9”).

With the option ‘Pages with changes’, exactly those pages are selected which are showing recorded text changes (via the option ‘Track text changes’):

This for example allows exporting only the revised pages as a PDF and print them out. In a screenplay these are the the blue, yellow etc. exchange pages.

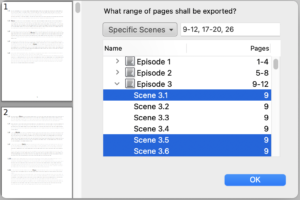
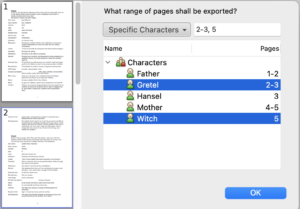
With the option ‘Specific elements’ you can select individual steps, scenes, episodes, ideas, character or location descriptions (multiple selection possible). This is possible because in DramaQueen the whole text is divided into individual text modules, e.g. scenes, characters… and is structured hierarchically. The page numbers of the selected elements are then automatically displayed:

It is also possible to select the desired page(s) directly by clicking the corresponding page in the new preview.

Very handy is also that you can combine all options. How?
For example, you first select the ‘Pages with changes’ option and if you then change the drop-down to ‘Page selection’, the changed pages will still be displayed, so that you can add certain other pages.


New fields in the Characters and Locations panels

It is important to us not to overload DramaQueen and therefore we take care not to offer unnecessarily small or duplicating options in the character and location panel.

Now, however, we have added four meaningful categories to the two panels: For locations there are the new fields ‘Feel’ and ‘Position and for the characters ‘Secret’ and ‘Temperament’.

If you like to learn why, for example, a secret can be a great dramatic tool in your character development just have a look at our DramaWiki.


All improvements can be found as always in our update report.


Continue Reading - 0